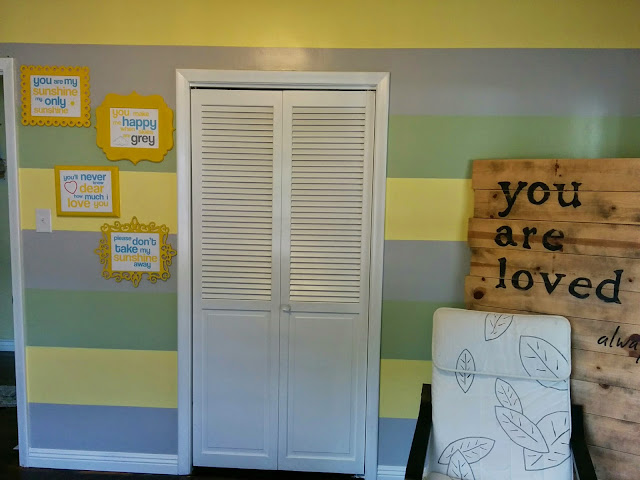
The nursery was finished right after the laundry room (that will be a later post). I was so excited to make it fun for her. Even though I don't have a baby on the way; I hope to have another baby sometime and when that happens I want the two kiddos to share a room. Therefore, I wanted to make it gender neutral. You know...in case I have a baby boy. I went with soft yellow, grey, and green. I am so happy with the way it turned out.
My list of favorites:
1. The striped wall.
I have never done stripes before so I was a bit intimidated, but I decided to not let a little paint scare me. I did the stripes 100% by myself as a rookie. So you can do it too! It was not bad at all! First off I painted all my walls grey. That way most of my room was done. Then I moved to the wall I was going to put stripes on. I just measured the height of the wall. Then set how wide each stripe was going to be. Mine are 12 inches. Once I had that I put marks down the width of the wall. I probably made 5-6 marks. Then came the only tricky part. I got my husbands handy chalk line. I have no idea why I love that thing but I do. I taped one end of the line to the wall on one of the marks and then moved to the other end of the wall to the corresponding mark, pulled the line tight and snapped the line. And ta-da! It worked. I had a perfect chalk line! My wall separated by a door and a closet door. So I had little sections, but if you have a bigger wall then split the wall so you can still pull the line tight with one hand and snap in the middle of the two points with the other. I did this over and over all the way up my wall. Once I was done with with the chalk line (sob) I busted out the frog tape. I like this tape best of I don't want the paint to bleed through. WHICH WAS MY FEAR THE WHOLE TIME!!!! I taped the spot of the first color I was going to paint (yellow). I only taped the side of where the yellow met the gray since it didn't matter if I went over where the green was going to meet it since I would be taping the green stripe off in the end. If you do it this way you save tape. I doubled checked that my tape was all the way pushed down so that nothing could bleed. Then I painted the yellow. TIP: make sure you go over the line of where you will paint your next color. I did not do that in a couple of spots and had to go back and do some touch ups. Nothing major, but learn from my mistakes. I waited 2 days in between all the colors. I wanted the paint to be completely dry before I started firmly pressing tape down on it. Lastly, I taped and painted the green and ta-da! I had a beautiful wall. Some of you might be thinking that was a weird wall to put stripes on. Well I tend to over think everything and I knew that there was never going to be a bed on that wall so that way I could never get in trouble for favoring one child over the other. I can already hear it now, "Mom why does Hannah get to put her bed by the stripes or visa versa. So....I went with a wall I knew that would not be a problem. I know. I am crazy in the head. Also, I like to look at a bright fun wall as I am leaving her room. It makes me happy.
The
lines are kind of hard to see but they are there. That is with the chalk
line.
Taping
to get ready to paint yellow
After
the yellow was painted
How
it looked right before I taped to paint the green
Green
taped and painted


No comments:
Post a Comment