Showing posts with label Crafts. Show all posts

Jan 27, 2020

12 Tips for DIYing Valentines Day Shirts with Iron On Vinyl

This is a sponsored conversation written by me on behalf of Cricut. The opinions and text are all mine.


12 tips to help you become comfortable with DIYing shirts using iron on vinyl.
I haven't made a shirt with iron on vinyl in YEARS!  AND when I did I didn't design it and cut it out myself.  However, I set a goal that I was going to do it.  Guess what?!  I did it and honestly it was SO SIMPLE!

I DIYed Valentines Day shirts for me and my girls using the Cricut Explore Air 2, Cricut EasyPress, and Cricut's Everyday Iron On and Patterned Iron On.  I am thrilled with how they turned out and I want to share some tips that I learned.

First off, I am going to share these files with you so you can make these exact shirts if you wanted too.  However, if you feel like you want to try to design something yourself then jump into Cricut design space and start designing.  There are so many things you can do!

12 Tips for DIYing Valentines Day Shirts with Iron On Vinyl

12 Tips for DIYing Valentines Day Shirts with Iron On Vinyl

12 Tips for DIYing Valentines Day Shirts with Iron On Vinyl


One thing I want to mention is you might want to watch this tutorial on how to use HTV Iron On for the first time.  It isn't the shortest video (I really try to make them short, but I feel like if you have NEVER done HTV then this is the least you can do to make sure you know the ins and the outs.

12 tips to help you become comfortable with DIYing shirts using iron on vinyl.

Next, I want to share with you 12 tips to help make Iron On vinyl easier.  These are things I have learned along the way.


1.  My number one tip is to let the vinyl cool for a bit.  If it is a warm peel (next tip will explain this) then make sure to let it cool a bit before trying to peel off the "backing".  I made this mistake and luckily I was able to save it but it could have been a disaster!  I say to let it cool for 20 seconds.

2. When you buy the EasyPress 2 you will get a booklet in the box that gives a website to help guide you when it comes to deciding what temperature to set the EasyPress on and also how long to set the timer for.  It will also tell you if you should peel it when its warm or cool.  It is very interactive.  You get to choose what kind vinyl are you using as well as what type of material you are adhering it to.  You can pull up that website here.

12 Tips for DIYing Valentines Day Shirts with Iron On Vinyl

3.  For an easy way to know what size to make your designs refer to these guidelines:

Adult:Around 11x11
Fitted adult: 9x9
Youth: 7x7
Toddler: 5x5
Onesie: 3x3

4.  When you get ready to cut out the vinyl the program lets you know that it needs to be mirrored and which side to lay down on the mat.  So just make sure to pay attention and you will get all the guidance that you need.  (For example, the way I am laying down the vinyl in the picture below is wrong, but thankfully the program corrected me and I fixed it which is the second picture.)
12 Tips for DIYing Valentines Day Shirts with Iron On Vinyl

12 Tips for DIYing Valentines Day Shirts with Iron On Vinyl

5.  To make it easier to find the center of the shirt then fold the shirt in half (pictured below) and run the EasyPress over it to create a crease.  

12 Tips for DIYing Valentines Day Shirts with Iron On Vinyl

6.  Make sure to preheat your material.  There will also be a suggested amount of time to preheat it in the heat guide that I mentioned above.

12 Tips for DIYing Valentines Day Shirts with Iron On Vinyl

7.  If you are wanting to do multiple colors (like what is seen in the shirts above, then make sure to use everyday iron on.  Glitter should be a top layer.

8.  Layers should be done separately.  As long as the protective sheet is not touching any other protective sheet then you can put as many "layers" on each time you apply the heat.  I felt like this tutorial showed this really well.

12 Tips for DIYing Valentines Day Shirts with Iron On Vinyl

9.  The first layers should be 10-20 seconds less because you don't want to overheat them.  This is also explained the the video tutorial above.

10.  One great way to not actually layer the iron on vinyl on top of each other is to use the slice method.  I did this on the unicorn and plaid shirt above.  It basically slices out the layered pieces so that all the vinyl is adhering to the fabric not to the vinyl underneath.  If you look at the picture below you can see that the hearts right under the horn are not layered on anything.  Before I did the slicing method the hearts were layered on the hair and the horn.  This video tutorial shows it what I am talking about and how to do it.

12 Tips for DIYing Valentines Day Shirts with Iron On Vinyl

11.  Never put the EasyPress directly on the Iron On material.  So make sure to save the plastic protectors and place them on top of the exposed vinyl each time you heat a new layer. 

12 Tips for DIYing Valentines Day Shirts with Iron On Vinyl

12.  Last tip is to just hold the EasyPress still, don't move it around.  This is prevent you from accidentally moving your vinyl.


Now one thing I want to mention, this isn't a tip, but something you want to be aware of.  You do NOT need TRANSFER TAPE.  It is already on the vinyl.


Lastly, I want to mention tools that will either make your life so much easier if you have!  I don't recommend anything unless I truly feel like you will benefit from it.

1.  Essential Tool Set:  This set will give you all the tools you need to slice, weed, and trim the Iron On materials.  It comes with a lot more tools to help do many more things with your machines as well.
12 Tips for DIYing Valentines Day Shirts with Iron On Vinyl

12 Tips for DIYing Valentines Day Shirts with Iron On Vinyl

12 Tips for DIYing Valentines Day Shirts with Iron On Vinyl

2.  EasyPress Mat:  You can use a folded up towel, but the way this mat is designed it helps eliminate moisture and directs heat right to your design.

3.  BrightPad: I have the BrightPad, but for these designs I didn't need it.  If you are working when it is dark it might help you.  Or if you are weeding a more intricate design then the BrightPad will help so much!


Jan 13, 2020

Should I Buy a Cricut Explore Air 2 (or an EasyPress 2)?

This is a sponsored conversation written by me on behalf of Cricut. The opinions and text are all mine.


See why a Cricut Explore Air 2 and an EasyPress 2 is worth the investment.  Check out what you can do with these machines and what kinds of projects you can make.
Have you been asking yourself if you should buy a Cricut Explore 2 or even an EasyPress 2? Then, if you have decided to buy one then where should you buy one? I asked the same questions and I am here to explain why you SHOULD buy these products and why. Also, explain some things about where you should buy them depending on what you are looking for.

First up, why should you buy it?
  1. It doesn't take up a lot of space so you don't need a huge crafting area. Gone are the days that you need cartridges for Cricut machines. Also, the EasyPress comes in lots of sizes. So you can get the size that you have space for.
  2. You can design/create your own designs. Nothing feels better than turning something inside your brain into reality. (Side note: There are plenty of ready to use designs as well.)
  3. It cuts so many things! (See a list below.)
  4. It writes beautifully for you, in case you are like me and dream of having beautiful lettering skills, but don't.
  5. It has a print then cut function. Gone are the days that you have to cut things out all the time! WHAT!?!
  6. It isn't loud. My family is a household full of people with sensitivity to sound.  So it being quite is necessary.
  7. It's easy to use and there are SO MANY resources to help you if you need to figure something out. There are tons of videos and tutorials.
  8. The EasyPress will simplify life for you and help you make your projects long lasting.
Should I Buy a Cricut Explore Air 2 (or an EasyPress 2)?
Writing done by the Cricut Explore
What can you do with the Cricut Explore Air 2?
  • Cut so many things! The list includes:
    • Paper
    • Card stock
    • Magnet Sheets
    • Vinyl (Holographic, Foil, Iron On, Dry Erase, Chalkboard)
    • Iron On Vinyl
    • Washi Sheets
    • Wood
    • Burlap
    • Tissue Paper
    • Leather
    • Duct Tape
    • Felt
    • Soda Can
    • So much more!
  • It writes beautifully.
  • The EasyPress 2 helps you transfer vinyl onto different materials such as:
    • Material
    • Wood
    • Metal
    • Paper
Should I Buy a Cricut Explore Air 2 (or an EasyPress 2)?
The whole banner was cut with the Cricut Explore
What can you make with a Cricut Explore Air 2 and an EasyPress 2?
  • Place Cards
  • Door Signs
  • Coloring Pages
  • Gift Tags
  • Garlands
  • Pillowcases
  • Ornaments
  • Cupcake Toppers
  • Magnets
  • Window Clings
  • Valentines
  • Greeting Cards
  • Mugs
  • T-Shirts
  • Wall Decor (I can't wait to make gold polka dots for my new house!)
  • Vases
  • Stencils (think stenciling the tops of wood stools!)
  • Organization Labels
  • Wreath Details (wood or fabric flowers anyone?)
  • And so much more!
See why a Cricut Explore Air 2 and an EasyPress 2 is worth the investment.  Check out what you can do with these machines and what kinds of projects you can make.

I have owned a Cricut machine for about 4 years now and love everything I can make with it. I don't consider myself a crafting genius, but I do like being creative and making my own things. I feel a sense of pride when I make things myself.

Check out the new products I received from Cricut as a partnership with them.  I am excited to bring new tutorials and new ideas for you to use in your own home.  Check out my unboxing video on IGTV.  Then leave a comment on what you have questions about and also what you want to see me make.

Check out these projects I have used the Cricut Explore to make:
Should I Buy a Cricut Explore Air 2 (or an EasyPress 2)?

Get a one or both of these products today and start making something for yourself.  Please send me what you make.  I love seeing others be creative as well!

Oct 6, 2018

DIY Fall Hoop Wreath

DIY Fall Hoop Wreath
It has been a few years since I made a Fall wreath.  I made the Halloween wreath last year, but not an overall Fall wreath.  I knew immediately that I wanted to use a hoop.  I thought I was going to use an embroidery hoop, but then my husband told me about 6 different metal hoops in the garage.  He showed me them and I immediately knew that is what I was going to use!

Feb 19, 2017

Wood Slice Crafts (St. Patrick's Day Wreath and Chalkboard Tutorial)

Wood Slice Crafts (St. Patrick's Day Wreath and Chalkboard Tutorial)
I have wanted to incorporate wood slices into my decor for some time.  Let's just say that wood slice crafts have been on my "to do" list for far too long.  Crafting lately just hasn't happened and it makes me sad, but it's my current reality.  

Sep 1, 2015

Quest for More Happiness-September 2015-Hobbies/Passions

time, books, paper crafting

My goals for September

The basis for my monthly goals is the AMAZING BOOK, The Happiness Project.  This month all my goals are centered around my passions and hobbies.  I love this month's goals because hobbies and passions can bring so much joy into my life, but at the same time I can feel so guilty for taking time to actually DO my passions and hobbies.


Jul 15, 2015

Cricut Design Inspirations!


**This post contains affiliate links and I will be compensated if you make a purchase after clicking through my links. **

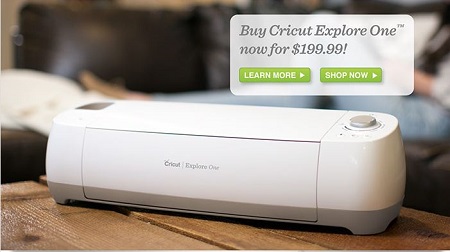
Now that you’re more familiar with Cricut Explore One™, Cricut Explore Air™ and Cricut Design Space™, it’s time to chat about some of the really neat things you can create when you put it all together. 

Jul 14, 2015

Cricut Design Space™


**This post contains affiliate links and I will be compensated if you make a purchase after clicking through my links.**

If you read last week’s post, you now know why Cricut’s Explore One™ and Explore Air™ machines are so incredible – and a must-have for any crafter. 

But what bridges the gap between the creative ideas in your head and the Cricut machine is the Cricut Design Space™. 

Jun 24, 2015

Learn About The Cricut Explore Machines


**This post contains affiliate links and I will be compensated if you make a purchase after clicking through my links.**


Want the ability to easily make a personalized wedding gift or perhaps some unique home décor? Then you might find Cricut electronic cutting machines to be the best DIY crafting tool since the sewing machine. 


Jun 20, 2015

Get to Know Cricut!

**This post contains affiliate links and I will be compensated if you make a purchase after clicking through my links.  However, I would never recommend anything that I do not LOVE.**

If you’re reading this post, chances are, you’re a creative type. You like to craft, explore your creativity, and share your creations with others. And it’s for people like you that Cricut created their line of personal electronic cutting machines. 

Jun 17, 2015

Burlap and Deco Mesh Sunflower Wreath

tutorial, yellow burlap, green deco mesh


Hi!  I'm so glad you are here!  I am sure you are here because you want to make this stunning sunflower wreath.  It is a show stopper and wherever you put it in your home it will be a conversation starter and people will love it.  

This wreath is absolutely stunning and is perfect for the Spring and Summer months!  It is durable and can be hung up outside on your front door.  It would make a great first impression to anyone who came to your home.  It would also make a fantastic wall hanging inside your home.  See the detailed tutorial below to make one for yourself.  

If you would like a printable tutorial along with pictures then click HERE!  You can see the step by step process below, but if you want to print it so you don't have to look on the computer than this is your solution!

May 22, 2015

Tulle Hair Bows For Girls

buttons, tulle, hot glue, hair clips

I have an obsession with tulle.  So I thought I would use some of the tulle around my house.  Actually, put it to good use.  I ran across a blog post that was all about making tulle bows and I thought I would give it a shot.  

May 13, 2015

Tips and Tricks when doing wood crafts

wood crafting, tips, tricks

Wood crafts are so fun and make rooms so interesting and inviting.  I love wood crafts because they are durable and long lasting.  However, many people are intimated by them.  There is no need to be intimidated by them....I promise.  I am going to give you some tips and tricks in this post to help you overcome the intimidation. 

Mar 25, 2015

Deco Mesh and Burlap Wreath

burlap flowers, decorative burlap ribbon, ribbon, hot glue, wire


This is one of my favorite projects I have made EVER.  Maybe it is because I used deco mesh for the first time and I love trying new things.  Maybe it is because I used burlap and I LOVE burlap.  It could be both of those, but my favorite part is the finished product.  I love the way it looks and I love the colors.  I am very happy with this wreath.  

I made this wreath for my future sister-in-law.  She had a bridal shower and the theme of the shower was around the house.  I was assigned the front door and I knew I had to do a wreath that she had been eyeing at Quilted Bear (local store).  I love everything about wreaths (I know I talk about it often) and so I was up for the challenge.  The only thing that made me a little nervous is that I had never used deco mesh before and I wanted the finished product to be fabulous.  

Come to find out deco mesh is so fun.  There are so many colors, but I stuck with the natural burlap color since I was using natural burlap for the flowers.  The colors work perfectly together and I am more than pleased with the outcome.

Jan 30, 2015

5 Valentines crafts you can easily make in a weekend


I love Valentines Day and all the love that goes with it!  This year went I went to pull out my Valentines decor I couldn't find the box!  We are doing a massive remodel and things have been misplaced.  As soon as everything is back in order it will all be found, but for now the box is missing.

Nov 26, 2014

My Christmas Present


You guys!  Santa is bringing me a Cricut Explore for Christmas!!!  AHHH!  Since this baby has came out it has been on my wishlist.  I am more than excited for this!

There are so many reasons that I want a Cricut Explore, but here are a few of my reasons!  

Oct 15, 2014

Jute Wrapped Monogram


My friend wanted to make some of these for friends and she asked me to help.  I thought it would be fun to have a craft day/night and help her.  I thought I can do that.  No big deal. 

Sep 26, 2014

Ladder Blanket Rack


Fall...my favorite season!  With Fall comes so many fun things: blankets, hot chocolate, soup, sweaters, jackets, boots, Fall decor, Halloween parties, pumpkin patches, Thanksgiving, family gatherings, and so much more.  Since I love blankets I wanted a fun way to display them.  I had been looking for an old ladder to hang them on, but I either did not like what I found or what I liked was too much for me to spend.  So I improvised.  See story below.  

Sep 19, 2014

Burlap and Polka Dot Halloween Banner


Disclosure: This post contains some affiliate links, which means I receive a small commission if you make a purchase using the some of links above.

I absolutely LOVE this time of year!  I love the cooler weather and the clothes that is brings (jackets and boots especially), I love the holidays that happen in Fall, and I love the decor.  I am so excited to share this tutorial with you today.  The other night I had a craft night with my friend.  She proclaims to not be crafty.  I do not believe it, but that is what she says.  So I wanted to see how she did on this craft.  I asked my husband after she left and he told me that her banner looked just as good as mine!  So there you have it.  This craft can be done by the self-proclaimed non-crafty people.  I promise!

Sep 8, 2014

Blog Tour!


Today I am participating in a blog tour!  I was very happy when Shanice from City of Creative Dreams emailed about being part of this blog tour.  I had to say yes because I love reading blog tour posts from all bloggers.  It is a fantastic way to get to know them.  Of course I want you to get to know me better so I jumped on the idea!  I will also introduce you to a couple of my favorite blogs right now.  I have a lot, but picked a couple.   First, let me answer the same questions that all the other bloggers have answered and then you get to see the bloggers that I am absolutely loving right now. You can see Shanice's answers to these questions on her site here.  She has an amazing linky party every week on Friday.  Go check it out to get a lot of inspiration from some very talented bloggers.  

Related Posts Plugin for WordPress, Blogger...